

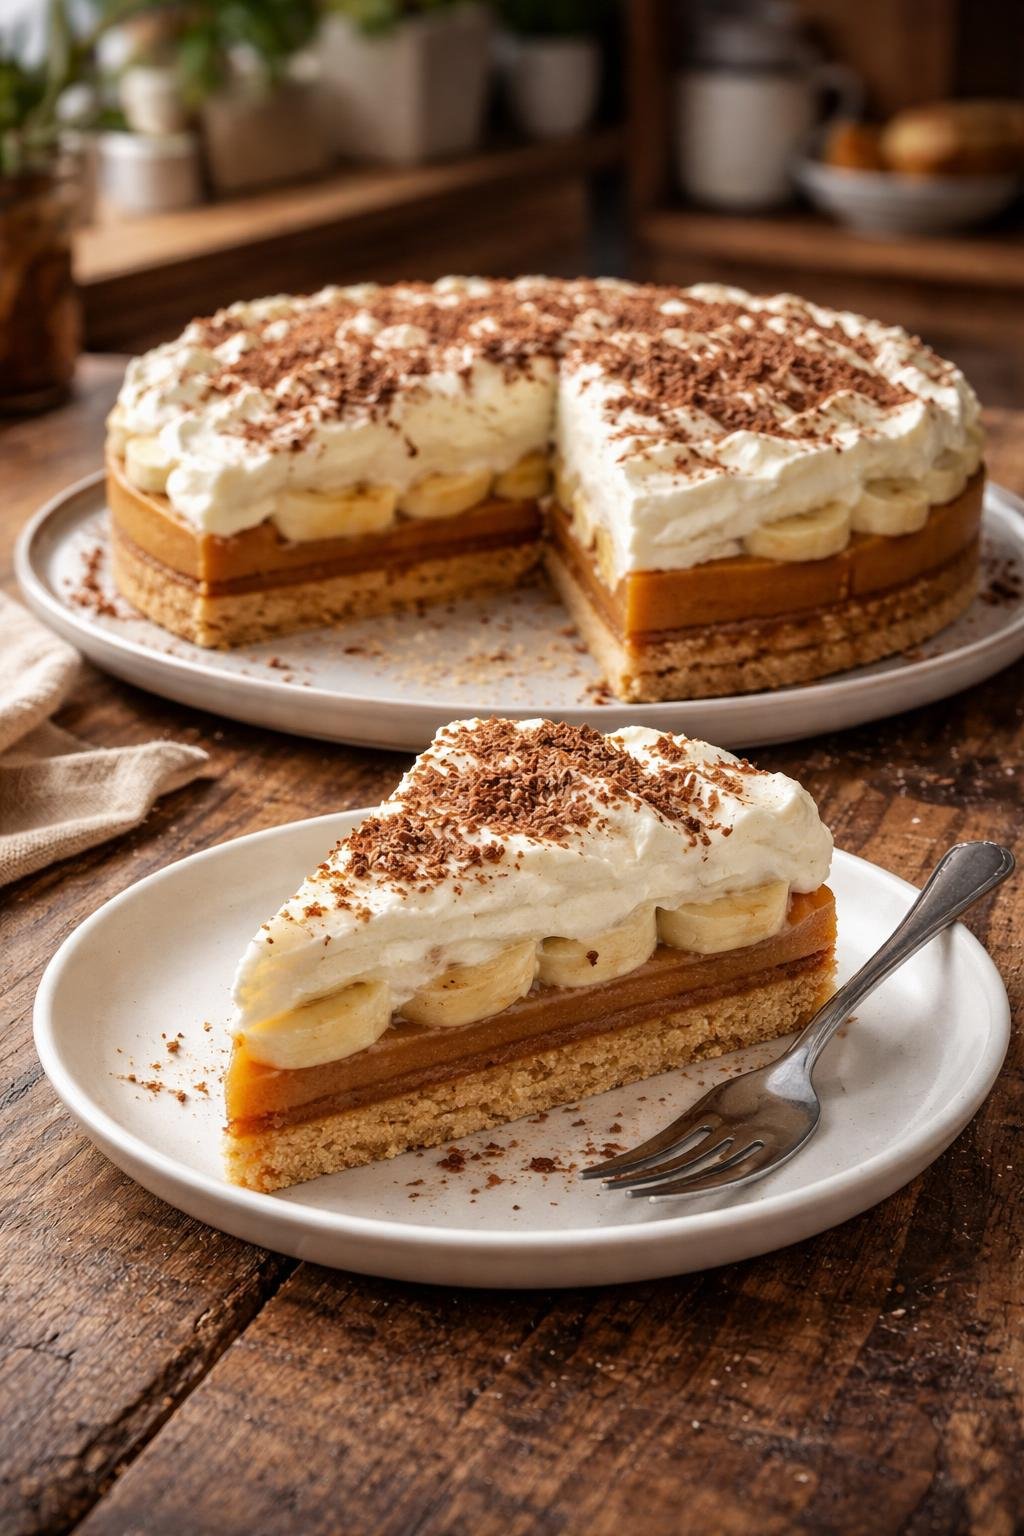
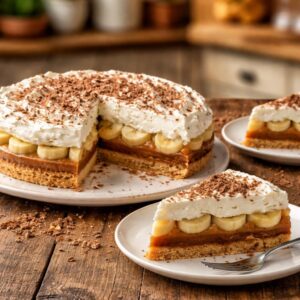
Banoffee pie is one of my favorite desserts. This Hairy Bikers Banoffee Pie Recipe is rich, creamy, and so easy to make.
I love how simple ingredients create magic. If you are learning how to make Hairy Bikers Banoffee Pie, you are in the right place.
This recipe is perfect for beginners. The Hairy Bikers Banoffee Pie Recipe is all about flavor, comfort, and fun in the kitchen.
I first tried this recipe after watching Hairy Bikers. Their style inspired me to keep things simple and tasty.
My Secret to the Perfect Banoffee Pie
My secret is balance. Sweet, creamy, and slightly salty flavors must work together.
I always use ripe bananas. They taste sweeter and softer.
I also chill the pie well before serving. This helps everything set perfectly.
Another small tip is not overwhipping the cream. Soft peaks are best.
Finally, I add a little chocolate on top. It adds a lovely finish.
Equipment List
- Mixing bowl
- Whisk or electric mixer
- Saucepan
- Spatula
- 8-inch pie dish
- Rolling pin or food processor
- Knife
- Refrigerator
Recipe Overview
- Recipe Name: Hairy Bikers Banoffee Pie
- Servings: 8
- Prep Time: 20 minutes
- Cook Time: 10 minutes
- Total Time: 30 minutes + chilling
- Course: Dessert
- Cuisine: British
- Calories: 420 kcal per serving
Ingredients You Need for Hairy Bikers Banoffee Pie Recipe
Here are the simple ingredients for Hairy Bikers Banoffee Pie:
- 200g digestive biscuits
- 100g melted butter
- 1 can condensed milk (397g)
- 2 ripe bananas
- 300ml heavy cream
- 2 tbsp sugar
- 1 tsp vanilla extract
- 50g grated chocolate (optional)
Step-by-Step Guide
1. Crush the Biscuits
Place the biscuits in a food processor. Blend until you get fine crumbs. If you do not have one, use a zip bag. Crush them with a rolling pin until smooth and even.
2. Mix with Butter
Pour the melted butter into the crumbs. Mix well until it looks like wet sand. This helps the base stick together and hold shape after chilling.
3. Form the Base
Press the mixture into your pie dish. Use a spoon or your fingers. Make sure it is even and firm. Chill it in the fridge for at least 15 minutes.
4. Make the Caramel
Pour the condensed milk into a saucepan. Cook on low heat. Stir continuously until it thickens and turns golden brown. This takes about 8–10 minutes.
5. Cool the Caramel
Remove the caramel from heat. Let it cool slightly before using. This prevents the base from getting too soft and keeps layers neat.
6. Add the Caramel Layer
Spread the caramel over the chilled biscuit base. Use a spatula to smooth it evenly. Make sure every part is covered nicely.
7. Slice the Bananas
Peel the bananas and slice them evenly. Not too thick and not too thin. This helps create a perfect texture in every bite.
8. Arrange the Bananas
Place the banana slices on top of the caramel layer. Cover the whole surface. Try to keep them neat for a beautiful look.
9. Whip the Cream
Pour heavy cream into a bowl. Add sugar and vanilla. Whip until soft peaks form. Do not overwhip, or it will become too stiff.
10. Add the Cream Layer
Spread the whipped cream over the bananas. Smooth the top gently. Make it look soft and fluffy.
11. Add Toppings
Sprinkle grated chocolate on top. This step is optional but adds extra flavor and beauty.
12. Chill Before Serving
Place the pie in the fridge for at least 1 hour. This helps everything set properly and makes slicing easier.
Expert Tips & Variations
- Use graham crackers instead of digestive biscuits if needed.
- Add a pinch of salt to caramel for a salted version.
- Use chocolate chips instead of grated chocolate.
- Try adding coffee powder to cream for a twist.
- Always chill before serving for best results.
A Little Backstory on This Recipe
Banoffee pie comes from England. The name comes from banana and toffee.
I remember making this pie for a family dinner. Everyone loved it. My younger cousin asked for seconds. That made me so happy.
This recipe reminds me of simple joys. Easy cooking. Sweet moments. Shared laughter.
That is why I keep coming back to this dish again and again.
Best Recipes to Enjoy Alongside Banoffee Pie
Banoffee pie pairs well with simple drinks and light snacks.
Try it with:
- Fresh coffee
- Vanilla milkshake
- Light fruit salad
- Simple butter cookies
These keep the focus on the pie.
Occasion or Event Ideas
This Hairy Bikers Banoffee Pie Recipe is perfect for many occasions.
- Family dinners
- Birthday parties
- Weekend treats
- Holiday desserts
- Tea time with friends
It is easy to make and always impresses guests.
Storage and Reheating Tips
- Store in the fridge for up to 3 days
- Cover with plastic wrap to keep fresh
- Do not freeze, as bananas may turn mushy
- Serve chilled for best taste
- Do not reheat this dessert
Nutrition Information
| Nutrient | Amount per Serving |
|---|---|
| Calories | 420 kcal |
| Carbs | 45g |
| Fat | 25g |
| Protein | 5g |
| Sugar | 30g |
FAQs about Hairy Bikers Banoffee Pie Recipe
1. Can I use store-bought caramel?
Yes, you can use ready-made caramel to save time. However, homemade caramel gives a richer flavor and better texture in this recipe.
2. How do I keep bananas from turning brown?
You can brush banana slices with a little lemon juice. This slows browning and keeps the pie looking fresh longer.
3. Can I make this pie ahead of time?
Yes, this pie is great for making ahead. Prepare it a day before and store it in the fridge until serving time.
4. What cream works best for this recipe?
Heavy cream or whipping cream works best. It creates a soft and fluffy topping that holds shape nicely.
5. Is this recipe beginner-friendly?
Yes, it is very easy. Even if you are new to baking, you can follow these steps and get great results.
Final Thoughts
This Hairy Bikers Banoffee Pie Recipe is simple, sweet, and full of joy. It brings comfort with every bite.
If you want to learn how to make Hairy Bikers Banoffee Pie, start here. The ingredients for Hairy Bikers Banoffee Pie are easy to find. Try it once, and it may become your favorite dessert too.
Hairy Bikers Banoffee Pie Recipe
Ingredients
- 200 g digestive biscuits
- 100 g melted butter
- 1 can condensed milk 397g
- 2 ripe bananas
- 300 ml heavy cream
- 2 tbsp sugar
- 1 tsp vanilla extract
- 50 g grated chocolate optional
Instructions
Crush the Biscuits
- Place the biscuits in a food processor. Blend until you get fine crumbs. If you do not have one, use a zip bag. Crush them with a rolling pin until smooth and even.
Mix with Butter
- Pour the melted butter into the crumbs. Mix well until it looks like wet sand. This helps the base stick together and hold shape after chilling.
Form the Base
- Press the mixture into your pie dish. Use a spoon or your fingers. Make sure it is even and firm. Chill it in the fridge for at least 15 minutes.
Make the Caramel
- Pour the condensed milk into a saucepan. Cook on low heat. Stir continuously until it thickens and turns golden brown. This takes about 8–10 minutes.
Cool the Caramel
- Remove the caramel from heat. Let it cool slightly before using. This prevents the base from getting too soft and keeps layers neat.
Add the Caramel Layer
- Spread the caramel over the chilled biscuit base. Use a spatula to smooth it evenly. Make sure every part is covered nicely.
Slice the Bananas
- Peel the bananas and slice them evenly. Not too thick and not too thin. This helps create a perfect texture in every bite.
Arrange the Bananas
- Place the banana slices on top of the caramel layer. Cover the whole surface. Try to keep them neat for a beautiful look.
Whip the Cream
- Pour heavy cream into a bowl. Add sugar and vanilla. Whip until soft peaks form. Do not overwhip, or it will become too stiff.
Add the Cream Layer
- Spread the whipped cream over the bananas. Smooth the top gently. Make it look soft and fluffy.
Add Toppings
- Sprinkle grated chocolate on top. This step is optional but adds extra flavor and beauty.
Chill Before Serving
- Place the pie in the fridge for at least 1 hour. This helps everything set properly and makes slicing easier.
Notes
- Use graham crackers instead of digestive biscuits if needed.
- Add a pinch of salt to caramel for a salted version.
- Use chocolate chips instead of grated chocolate.
- Try adding coffee powder to cream for a twist.
- Always chill before serving for best results.