
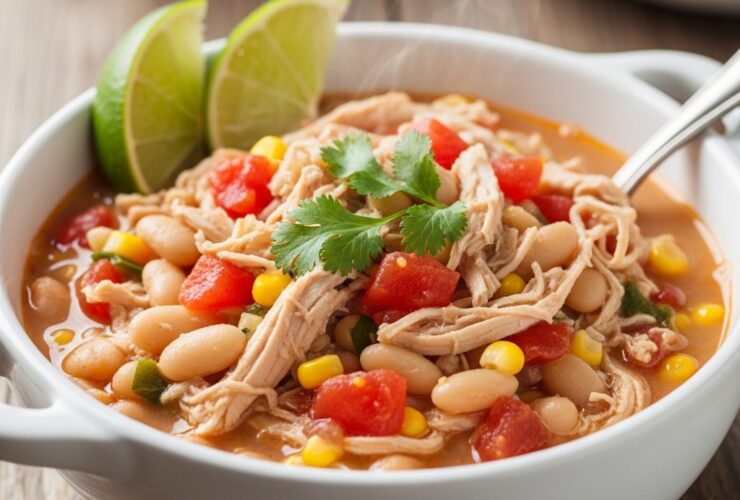
The Ina Garten Chicken Chili Recipe is cozy. It feels warm and comforting. It is perfect for busy nights. This dish is simple to prepare. It uses everyday pantry staples. The flavors taste bold yet balanced. Beans add creamy texture. Chicken makes it hearty. Spices bring gentle heat. The Ina Garten Chicken Chili Recipe shines in fall. It also works ...
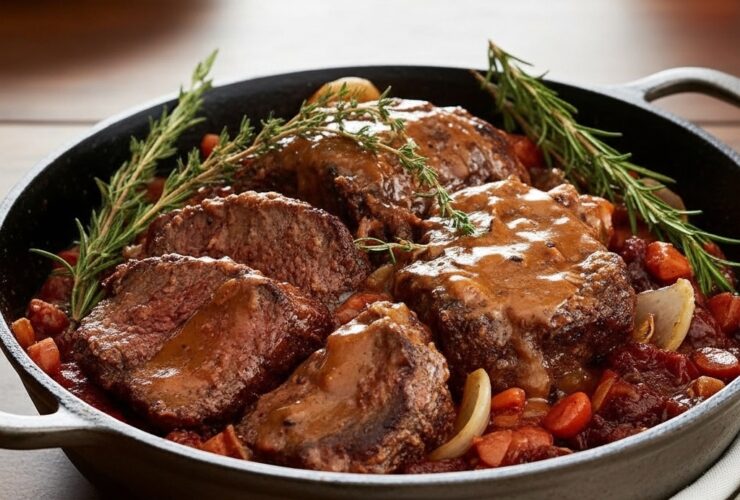
The Ina Garten Pot Roast Recipe is pure comfort. It is rich and deeply flavorful. The meat turns tender and juicy. Every bite feels warm and satisfying. This classic dish suits family dinners. It also fits special gatherings. Many cooks trust this simple method. The steps are clear and reliable. The Ina Garten Pot Roast Recipe uses basic ingredients. Yet ...
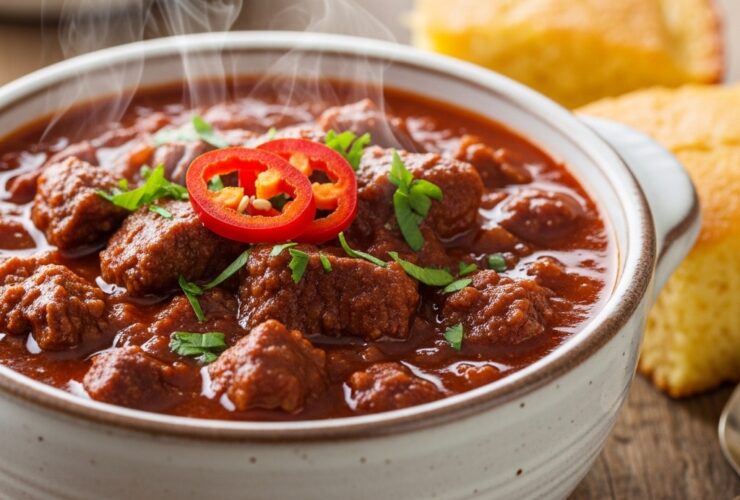
The Paula Deen Texas Chili Recipe is bold. It is rich and hearty. This dish brings true Southern comfort. It is packed with deep flavor. Every bite feels warm and filling. The Paula Deen Texas Chili Recipe uses simple pantry staples. It focuses on meat and spices. There are no beans in Texas style. The texture is thick and chunky. ...

Fresh tomatoes taste like summer. Southern kitchens love simple pies. The Paula Deen Tomato Pie Recipe celebrates both. It uses ripe tomatoes and cheese. Each bite feels rich and bright. This pie looks beautiful on tables. It fits brunch or supper menus. The Paula Deen Tomato Pie Recipe is comforting. It blends creamy and tangy flavors. Home cooks enjoy its ...
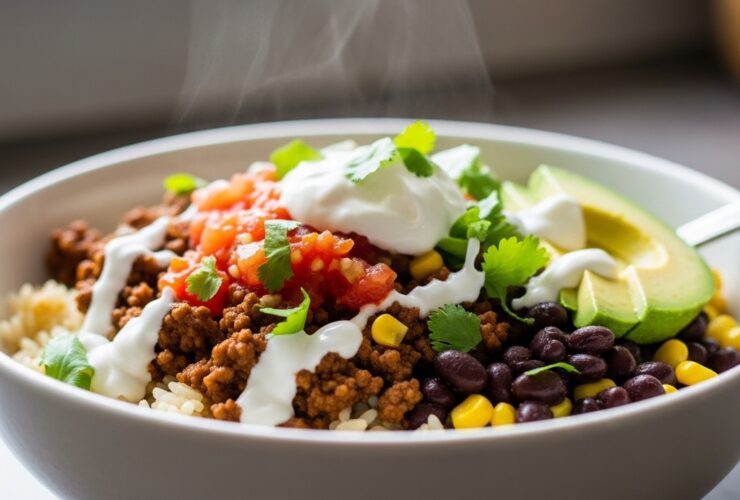
The Pioneer Woman Burrito Bowl Recipe is bold. It is fresh and colorful. Every bite feels comforting. You get layers of flavor. You get texture in each spoonful. This Pioneer Woman Burrito Bowl Recipe is simple. It uses pantry staples. It also uses fresh produce. The flavors feel homemade. They taste rich and balanced. You can prep it ahead. You ...

The Pioneer Woman Shepherd’s Pie Recipe is pure comfort. It feels warm and filling. Every bite tastes rich and hearty. This dish is perfect for family dinners. It is simple and budget friendly. You can make it ahead easily. The Pioneer Woman Shepherd’s Pie Recipe uses basic ingredients. They are easy to find anywhere. The flavors are classic and balanced. ...
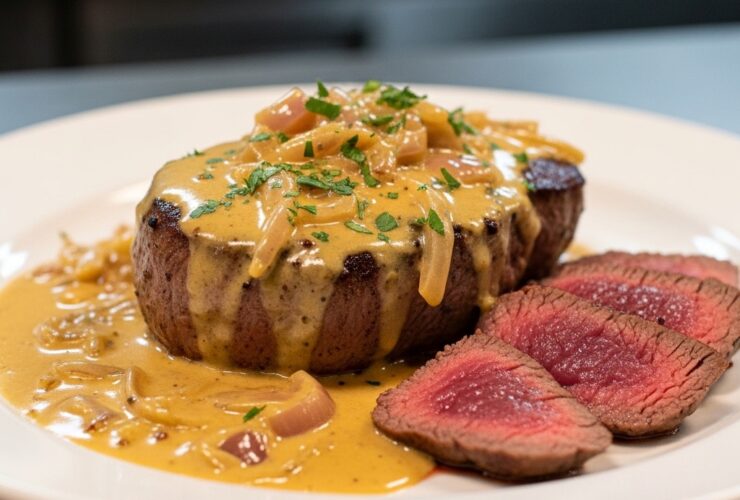
Classic steak dishes never lose their charm. This recipe feels rich and comforting. It brings restaurant flavors to home kitchens. The sauce tastes bold and creamy. The beef stays tender and juicy. The Gordon Ramsay Steak Diane Recipe feels elegant yet simple. It works for special dinners. It also fits busy evenings. The steps stay easy. The results feel impressive. ...
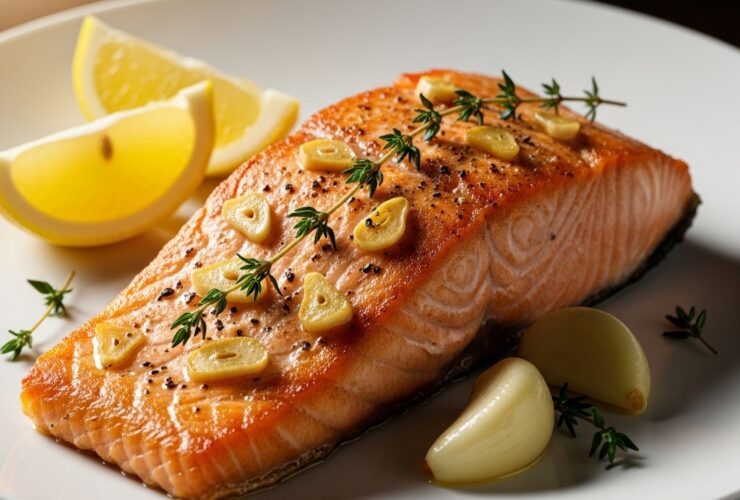
Great salmon deserves careful cooking and simple flavors. This recipe highlights crisp skin and tender flesh. Home cooks love restaurant style results. The method uses heat control and patience. Flavors stay clean and fresh throughout. This Gordon Ramsay Pan Fried Salmon Recipe feels elegant yet easy. It works for weeknights and special dinners alike. You need basic tools and fresh ...

Warm, creamy dips bring people together fast. This dish feels rich, simple, and comforting. The Paula Deen Artichoke Dip Recipe delivers bold flavor easily. It suits parties, holidays, and casual nights. Each bite tastes cheesy and deeply savory. The texture stays smooth and perfectly scoopable. Artichokes add balance and gentle bite. This recipe uses familiar pantry ingredients. Preparation feels relaxed ...
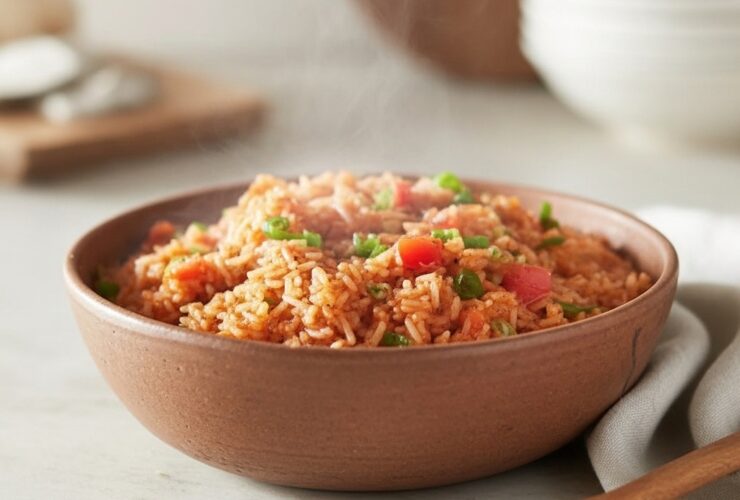
Southern comfort food feels warm and familiar. This dish brings bold flavors and rich color. Rice cooks tender and absorbs seasoned tomato goodness. Families love it for busy weeknights. Guests enjoy it at gatherings and potlucks. The Paula Deen Spanish Rice Recipe feels hearty yet simple. It uses pantry staples found in most kitchens. Every bite feels comforting and satisfying. ...